
Draw Realistic Faces from Your Imagination: Free Art Lesson

[Today we have a guest post and free art lesson from Crystal Parker]
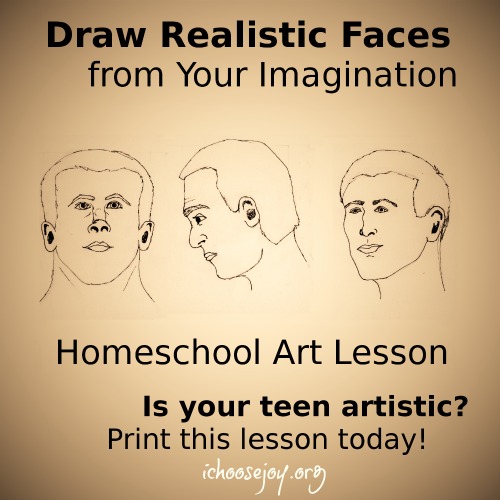
Draw Realistic Faces from Your Imagination: Free Art Lesson
Do you have an artistic teen? Would you like to make her happy? Good! To make your artistic teen happy, let’s teach her how to draw realistic faces from her imagination with a free art lesson.
The most difficult way to draw realistically is from our imagination. Drawing from real life is the basis of drawing realistically. Drawing from the memory of previous drawings is one step beyond. And drawing from the imagination is like magic. Poof!
Thankfully, like with the magician, there are tricks behind the magic. Sometimes very simple tricks. The magic trick I will teach you today is called the Loomis Method of drawing faces. It’s like scaffolding that you build your drawing around.
Andrew Loomis
Andrew Loomis was an illustrator for advertising and magazines in the 1920s, but the real reason he is remembered today is for his series of art books. His fifth book “Drawing the Head and the Hands” covers this technique in far more detail that I will today.
The basics are very simple and will get you drawing faces in minutes, but like all tricks, there are degrees of difficulty. Juggle two balls, draw a face straight on. Juggle six balls, draw a face looking up and tilted to the left. Throw in a baby and… well, we won’t go there today.

Let’s go through the steps, please follow along and see what you can do in a couple minutes!

No one’s head is perfectly round, but there is a roundness to the skull and so by cutting off the sides we can represent the sides of the head. This will look slightly different from every angle. We cut off a piece about 2/3rds of the height of the circle.

Now we add three somewhat curved lines. They determine the tilt of the face and help us place some of the features. From the top down they can be thought of as:
One: Hairline
Two: Eyebrow and Ear line
Three: Nose Line
Another way to think of it is: Rub your forehead, Rub your Eyes and Scratch your Nose. The top line is where the hairline ends and the forehead begins, the next one in the top of the eyebrow and the top of the ear. The bottom one is the tip of the nose and the bottom of the ear.

This is pretty easy. You notice you’ve got two chunks of face already? Forehead to eyebrow and eyebrow to nose. They’re roughly the same size, right? The chin should also be roughly the same size.
Of course, this changes slightly with the tilt thanks to perspective! For example, if your character is looking up at the ceiling you’re going to have a smaller space for the top of his head and a larger space for his chin. And all the features, especially the nose, will look different from that angle too!

Ah! The hard part! Or is it? You already have 3 measurement lines to place the features. Remember from the top down:
One: Hairline
Two: Eyebrow and Ear line
Three: Nose Line
There’s a few more you should know. I’m a big fan of observational drawing, so I’m not going to tell you exactly how to position every feature and have you memorize a set of rules.
Instead, I want you to go look in the mirror and ask yourself these questions:
How big is the space between my eyes when I measure it against the width of my eye?
How wide is my nose in relation to my eyes?
If I drop an imaginary line down from my eyes to my lips, where do the ends of my lips line up?
Try and think of some other spatial questions you can ask yourself. It will be easier to remember and apply rules that you figure out from your own observations! All these observations will roughly apply to any face you draw from your imagination, we are all people after all!
Art Challenge:
Draw three faces! One from the front, one from the side, and one ¾ view. For extra fun, finish them up with appropriate attire!
–>>To get this lesson as a b&w printout for your student: Click Here<<–
I hope you enjoyed this lesson on drawing faces using the Loomis Method! I’ve got lots more fun art lessons on my blog at inspiremyartist.com.
Free ebook
I even have a free ebook available for my email subscribers that will get your teen started with acrylic paints: “The minimum a homeschooler needs to start painting with acrylics”
Looking for a high school level fine art curriculum?
Please take a moment to check out my online homeschool art curriculum Inspire My Artist 1.0:

Inspire My Artist 1.0
- Teaches essential skills, principles, and techniques for realistic representational drawings.
- Inspires creativity and imagination; each lesson concludes with an art challenge that ensures that every student’s art is unique and personal.
- Covers multiple mediums including: pencil, collage, colored pencils, watercolor, ink, and pastels.
(Disclosure: This post contains affiliate links.)


This is SUCH a great post. My kids love to draw, but they regularly comment that faces are hard! I can’t wait to share this with them. I look forward to downloading the free eBook, as well. Thank you for sharing!
So glad you like it! A review of the Inspire art course will be coming in the next couple of weeks!
–Gena