

Bread Baking Primer
I've been baking our own bread for the past six months. We haven't bought any sandwich bread in that whole time (except when we were on vacation)! I thought I'd share how I do it here. It's really not that hard or time-consuming. And it tastes so much better than store-bought, as well as being better for you.
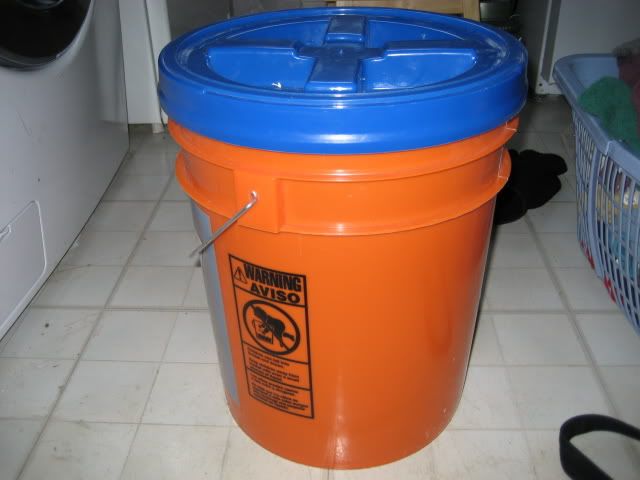
I bought the mixer, grain mill and many supplies from Urban Homemaker (urbanhomemaker.com). (You can also make the bread by hand and buy wheat flour at the store if you don't want to get a mixer or mill.) I get 100 pounds of wheat berries at a time from a food co-op that my friend is a part of. I bought two 5-gallon buckets from Home Depot and put gamma lids on them and oxygen absorbers in them (bought at wisementrading.com). The gamma lids completely seal the buckets so that nothing can get in. The oxygen absorbers absorb all the oxygen from the bucket, killing any bugs or eggs which may have been in there. The wheat will then keep indefinitely!
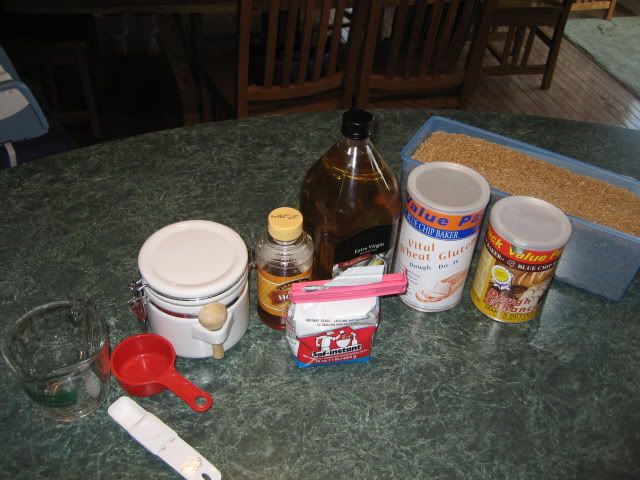
Ingredients: oil, honey, dough enhancer, vital gluten, yeast, salt, and wheat berries:
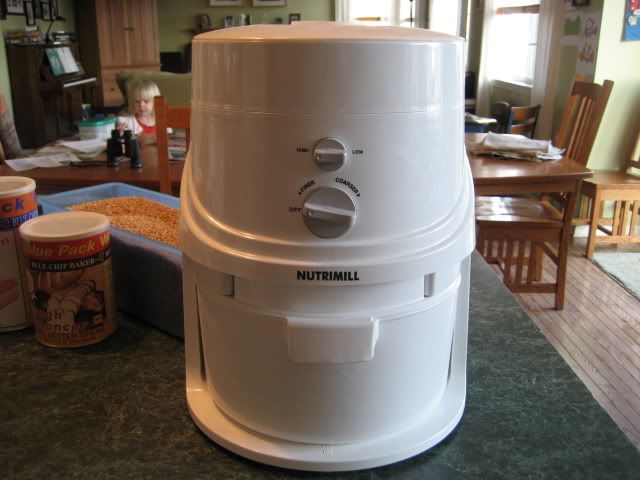
Bosch Mixer and Nutrimill Grain Mill:

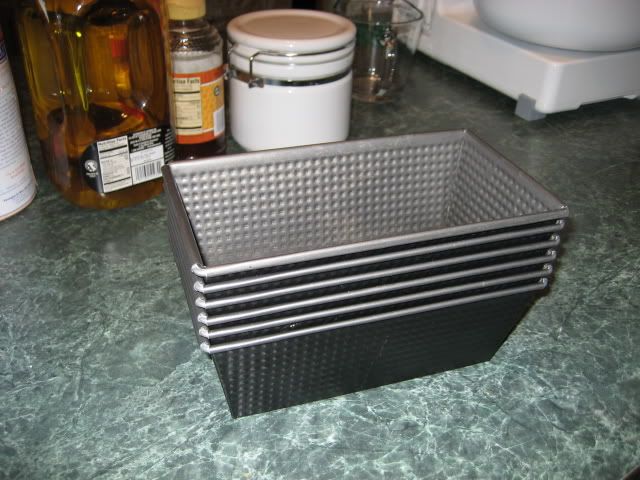
Six bread pans to make six loaves at a time. This lasts us about a week:
A 5-gallon bucket with gamma lid on:
Here is the recipe for Marilyn's Famous Whole Wheat Bread Recipe. I use 2 1/2 TB of yeast, 2 TB of salt, 2 TB dough enhancer, and 1/2 cup of vital gluten. One time I ran out of vital gluten, so I left it out to see how the bread would be different. The bread was very crumbly and wouldn't hold together when cut. It was still edible, but the texture is much better with the vital gluten. I grind 11 cups of wheat berries, but I've never counted exactly how many cups of flour I use. Sometimes, there is some left over, which I put in a baggie in the freezer to use the next week. Sometimes, I have to grind a little more. It depends on the humidity, etc.
Step 1: Set everything out. It helps me to set it all out the night before, so I can get started early in the morning. It takes me 2 1/2 hours from start to finish, not including cooling the bread. But I'm not working the whole time, so we get started on our schoolwork when the bread is rising and baking.
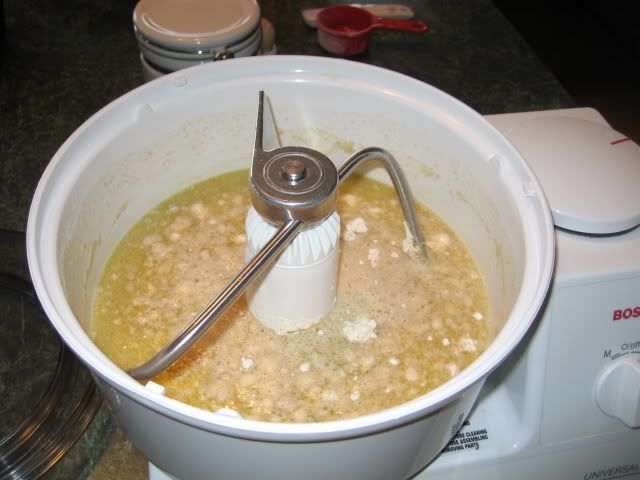
Step 2: Grind 2 cups of berries in the mill. While it's grinding, put honey, oil, dough enhancer, yeast and very warm water in the mixer. Add 2 cups of freshly ground whole wheat flour. Mix a few seconds and let it sit there for 15 minutes. This is called sponging.
Step 3: Put 9 cups of wheat berries into the mill to grind. It takes about 7 minutes.
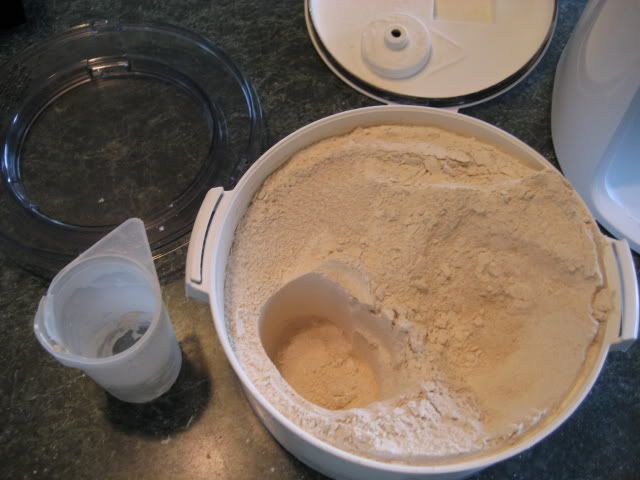
Step 4: After the 15 minutes of sponging is up, add salt and vital gluten to the mixer. Mix a few seconds. Add one cup of flour at a time and mix a few seconds. You're done adding flour when the dough cleans the sides of the bowl.

Step 5: "Knead" the dough for 6 minutes–just turn the mixer setting to "1" and set the timer.
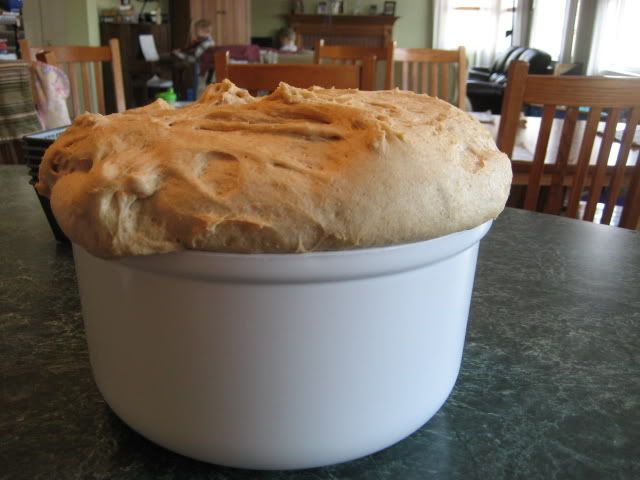
Step 6: Turn the oven on for a couple of minutes to warm it. Remove the dough hook from the mixing bowl and place mixing bowl in the warmed oven for 30 minutes. Instructions usually say to cover the bowl with a damp cloth, but I never do.

Step 7: After 30 minutes, my dough has always started to come out over the sides of the bowl, so it's time to put into the bread pans.
Step 8: Pull out dough and put enough into each pan to fill it halfway. I never "shape" the dough, but just stuff it in there and try to flatten the top! I think the bread looks pretty nice when baked, so I haven't worried about shaping it nicely!
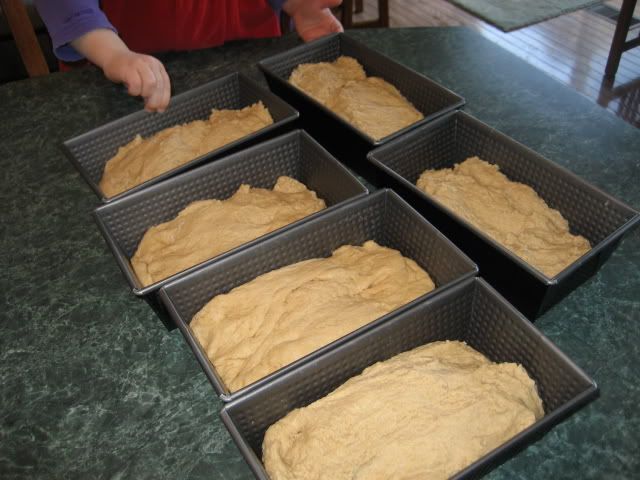
Step 9: Place the 6 pans back into the warmed oven (turn back on for a couple of minutes if necessary.) Set the timer for 30 minutes again. By that time the dough has always risen to the tops (or a little above the tops) of the pans.
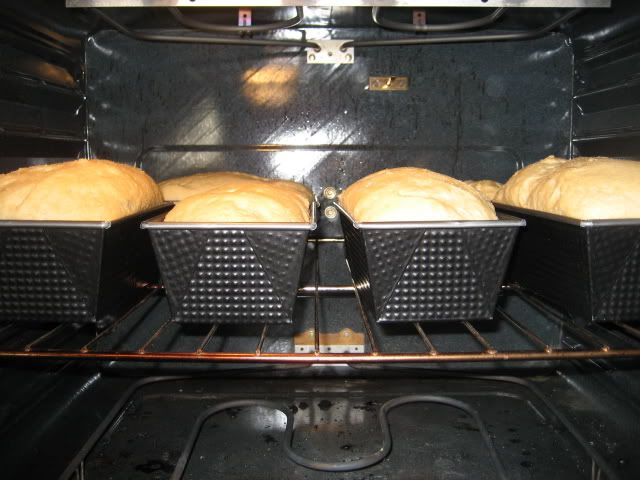
Step10: Turn the oven to 350 degrees and set the timer to 30 minutes once more. My bread has always been perfectly baked by following these instructions.
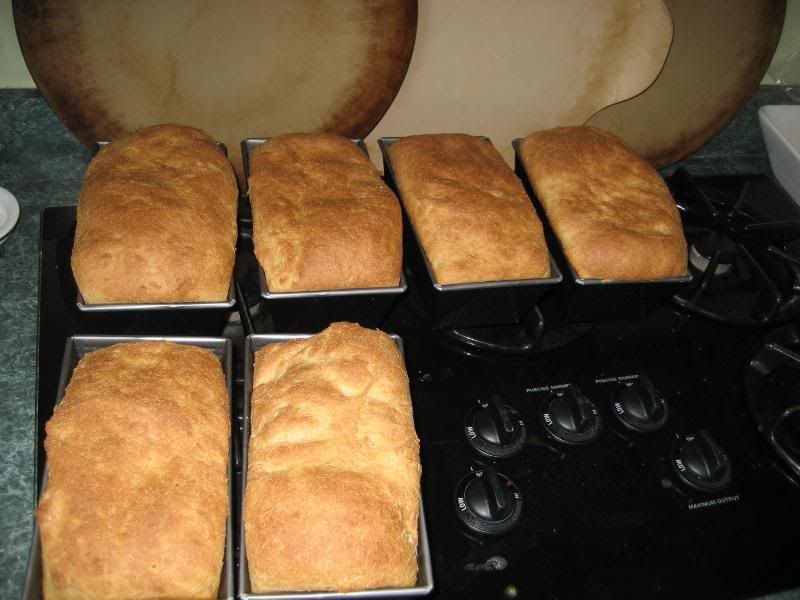
Step 11: If you let the bread cool a bit before cutting, it will slice better (won't be so doughy).
Step 12: Cool completely and place in bread bags. I keep 2 or 3 loaves out and put the rest in the freezer. Don't put bread in the refrigerator as that will dry it out.
Step 13: Enjoy!


In the fall a friend of mine had a bread making class and while I had fun making the bread (I went to her class 4 different times) it is very time consuming. We kneed the dough by hand for almost 45 minutes to an hour. I just simply don't have the time in the day to do that. However, you made it all look very simple. You have inspired me. I would have to buy some every duty mixer though.
BTW—LOVED the birthday cake. How creative! : )
Judy
http://myadventuresinhomeschooling.blogspot.com/
Thanks for sharing how you make your bread. I haven't tried any with the vital gluten and dough enhancer yet. I also had no idea the fridge could dry out the bread.
Jenny
But I haven't heard of gamma lids. That sounds likea good idea. I may look into this.
I'm so intrigued by your breadmaking — especially since bread (the good kind, anyway) is over $3 a loaf at the store now!! I might have to give it a stab one of these days!
I was so glad to run across your blog. I too have a Bosch & Nutrimill. I am very saitsfied with both. The price of wheat berries has gone up so much that as of late I have been buying Bobs Red Mill instead & just making bread that way. I know its not as fresh though.
We were not satisified with Marylinns recipe & have tried many, many different bread recipe, finding that none were what we were looking for. UNTIL~ finally a friend of ours gave us the recipe we are using now.
I have also found a nice bread slicer thing-a-ma-bob. I was using an electric knife to cut with before & Id get very irregular pieces of bread.
Anyhow, enjoyed your blog & so happy to know you have the Bosch & Nutrimill!
Rejoicing in Him, Patrizia
I’ve tried making bread in the oven, but never turned out well. So, I invested in a bread making machine, but that makes one loaf at a time. Now it just sits on the pantry shelf. However, you make seem easy enough to try again. So, I will give it another stab at it. I will post my experience on my blog http://homeschoolconnection192.blogspot.com/