How to Host a Big Messy Art Camp: Summer Camp Series
Big Messy Art Camp
[Today’s post “How to Host a Big Messy Art Summer Camp” was written by contributor and homeschool mom Michelle Habrych.]
Summer is a great time to get outside and be active with the kids. It’s also a great time for the art projects you don’t want to attempt in the house due to the mess involved. I get it! For many years I ran a camp I called “Big Messy Art Camp” out of my yard for other families to join me and my kids in messy projects.
With social distancing now, you may not want to include others, but there’s no reason you cannot have a messy fun time on your own. Or, you might want to host a camp at your own house and invite a few kids over to join you! Let me tell you some of our favorite projects and resources to direct you for a creative week.
Disclosure: I get commissions for purchases made through affiliate links in this post.
How Long to Do the Big Messy Art Camp
I have done the camp as a partial day, for three to five hours a day. Usually, I would start around 10 in the morning, so I would have time to set everything up in my yard.
Tips for Your Big Messy Art Camp
- Use a canopy pop-up to provide shade but kids also need sunblock.
- Set up folding tables covered in plastic tablecloths from Dollar Tree, taped down with masking tape.
- Tape a garbage bag to a nearby area and clean as you go.
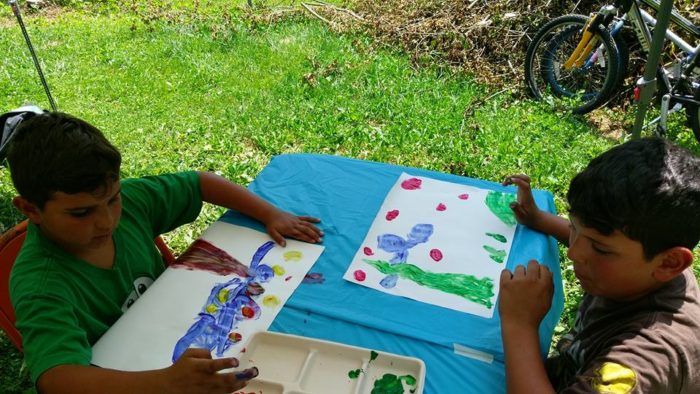
The key is to make a mess but to have as little to clean as possible. What do I mean? Well, I used to use reusable paint trays, but with 10 artists and just one mom, that was too much work. Styrofoam divided plates from Dollar Tree would work well, or even paper plates in a pinch. To hold water for cleaning brushes in between paints, use old plastic containers from butter or stained Tupperware. They need to be on the shorter and heavier side so that they don’t tip over (no tall plastic cups!).
SCROLL TO THE BOTTOM FOR A FREE SUMMER CAMP PLANNING GUIDE!
Project ideas:
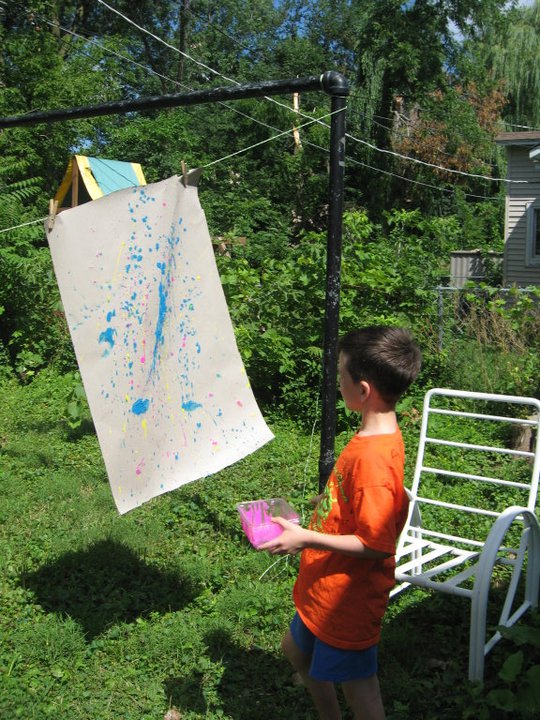
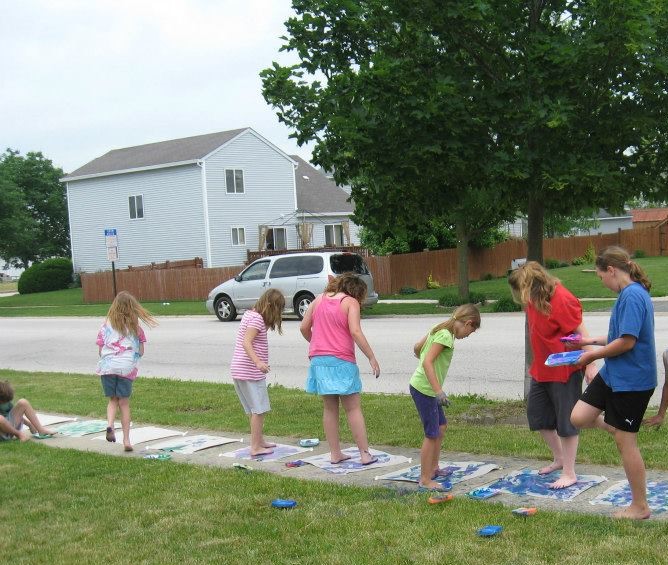
Splatter Painting
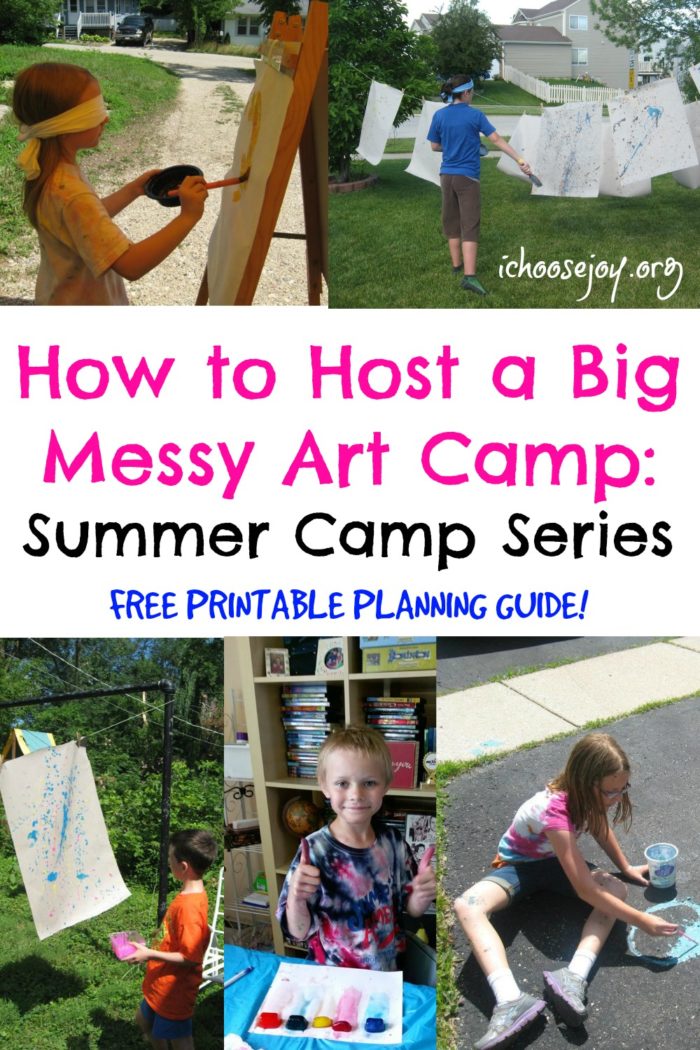
The all-time favorite project for all of my campers is splatter painting. Made popular by American artist Jackson Pollock in the 1940s and 1950s, splatter painting is essentially getting a load of paint onto a vessel of some type (more on this in a moment) and throwing it at paper. Yes, it’s as messy as it sounds.
What type of vessels should you paint with?
- Stiff paintbrushes
- Paint mixing sticks (get free at a hardware or paint store)
- A pasta spoon
- Fly swatter
- Spatula
- Old toothbrushes
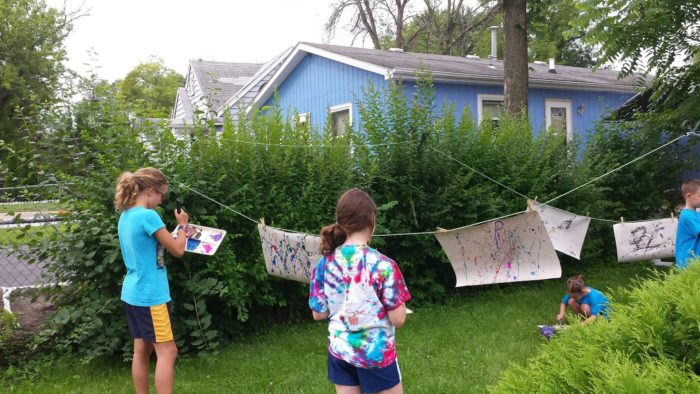
You get the idea. I always started the day with this project and gave the campers a large piece of butcher paper, pinned to the clothesline. The paint drips down the paper and creates a cool look as the artist layers colors and tries other vessels. For a fun finishing touch, I sprinkled a pinch or two of glitter across the wet paint.

Beware, paint will get EVERYWHERE! This can include eyes, hair, legs, clothing—you name it!
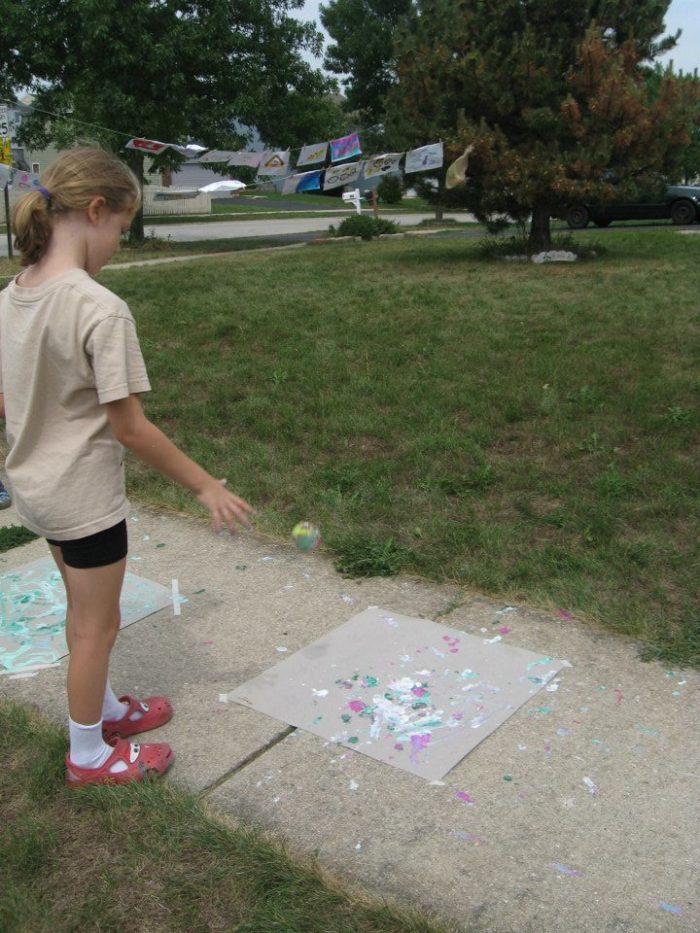
Tennis Ball Drop
Along the lines of splatter painting is tennis ball drop. Get old tennis balls (or any balls you don’t mind getting paint all over!) and a chair or step stool. Dip the ball in paint and then stand over a piece of paper taped to the ground or weighed down with rocks (pavement works best but you will get paint on the surface). Drop the paint-covered ball onto the paper. As it rolls around it will make unique designs in addition to the initial splat make when it hits the surface.
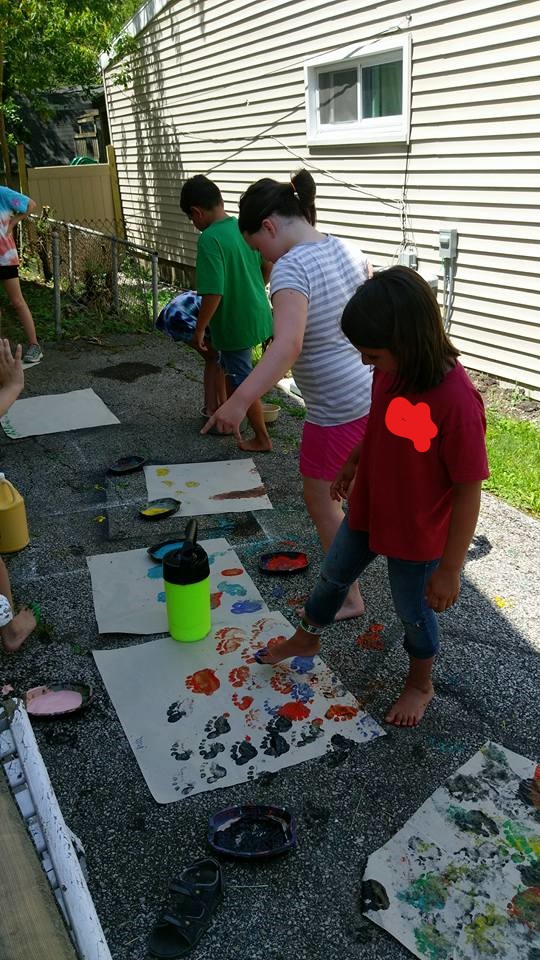
Foot Painting
Another project which features putting paper on the ground is foot painting. I use butcher paper for this one and affix it to the ground as mentioned above in tennis ball drop. I have the artists choose to either just dip their feet in the paint (this is where disposable paint trays/plates are key!) or to attach sponges to their feet with rubber bands and step into the paint. They could try both as well.
Their painting can be as simple as footprints or as involved as a toe-painted version of Van Gogh’s Starry Night (seriously!).
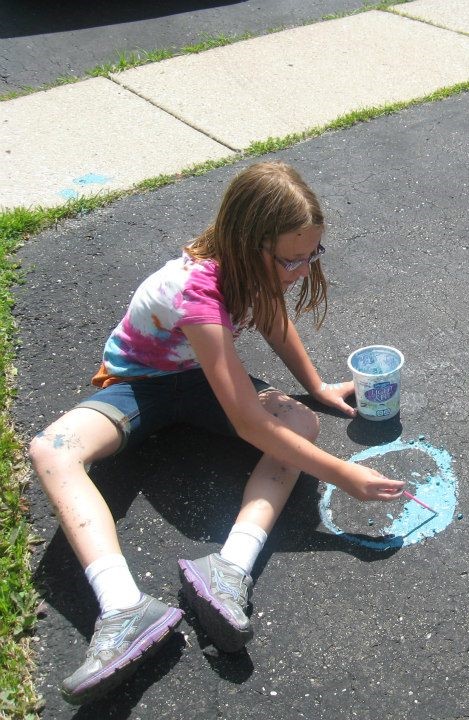
Sidewalk Chalk Paint
One fun project that is done on pavement of some type is sidewalk chalk paint. Gather cheap chalk of all colors and sizes, sandwich plastic zipper bags, old jars, a hammer, and some water. For each color, gather chalk pieces into a bag, close, and pound gently with the hammer. I say gently because you don’t want to make holes in the bags (experience talking!).

Once you have a nice powder (some chunks are okay), pour contents into an old jar and mix with a little water until you reach the desired consistency. If you put lids on them, the paints can be stored and used another day. If they dry out, just add water.
Then, paint on the sidewalk with it!
Need a moment of calm in the midst of the messy art day? Try these mindfulness coloring pages for kids.
Snap Painting
When you’re ready to sit at the table, there are plenty of projects to create there too! Snap painting involves old wooden or plastic picture frames with the glass and backing removed, rubber bands, and paint!
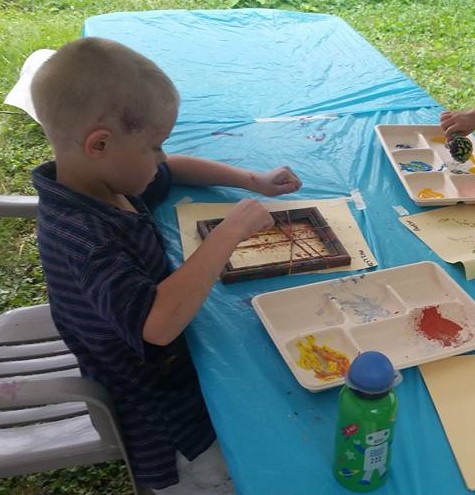
Tape a piece of paper to the table and then stretch rubber bands across the frame in any way you wish. You could do only horizontal or also cross them with some vertical. Lay the frame over the paper. Paint the rubber bands and then, while it’s still wet, pull back the rubber band and release. Little spurts of paint will be the result. Layer colors and be creative! I think it resembles fireworks.
Paint With Unusual Items
Painting with paintbrushes is fine, but there are so many other items your artist can use to make creative pieces. Hot Wheels cars, marbles, Koosh balls, beaded necklaces, q-tips, bubble wrap, Lego bricks, cork, old combs or hairbrushes—anything which would make a unique print is what you want. The kids have so much fun with this one!
I had some squares of plastic grids; I think they were used for some kind of needlecraft. The kids loved that pattern on their pictures.
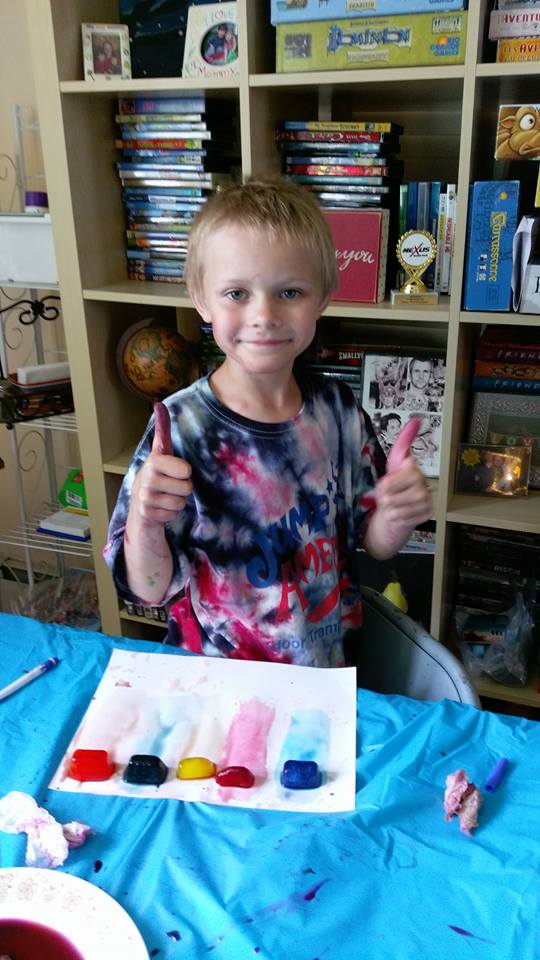
Ice Cube Painting
A project which requires some preparation the night before is ice cube painting. Mix a drop or two of liquid watercolor into ice cube trays. (I use trays specifically for this purpose because the paint stains.) In a pinch, you could probably use food coloring.
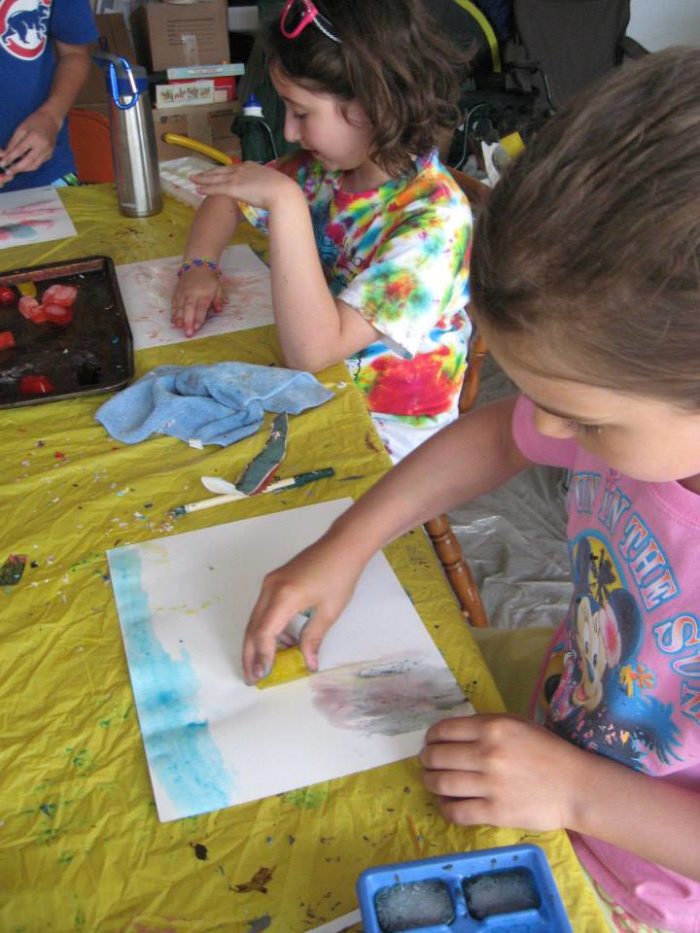
Once the cubes are solid, your artists can use them to “paint” on watercolor paper which is taped to the table. If it’s really hot out, they will melt quickly. This can be fun to “splatter” the melting color onto the paper. This will be one of those projects that won’t necessarily be one of the most beautiful paintings you’ve ever seen, but it will be fun.
As my art guru MaryAnn F. Kohl believes,
“It’s the process, not the product.”
~MaryAnn F. Kohl
Her art books were the inspiration for my teaching in homeschool camps and classes over the past decade and a half.
Speaking of process, here are some more hands-on messy fun projects that may or may not produce something you wish to treasure, but the kids will have a blast.
It might also be fun — and useful!– to make a mindfulness calm down jar.
Collage
Collage is a favorite and the best part of doing it outside is not worrying about the mess. Gather dried beans, pastas, rice, old magazines, wrapping paper and construction paper scraps, cotton balls, Easter grass, wallpaper samples or scraps, aluminum foil, and anything else that can be glued down. I have the artists use some kind of board for their project.If you don’t have that, try cardstock or even glue paper to cut cardboard.
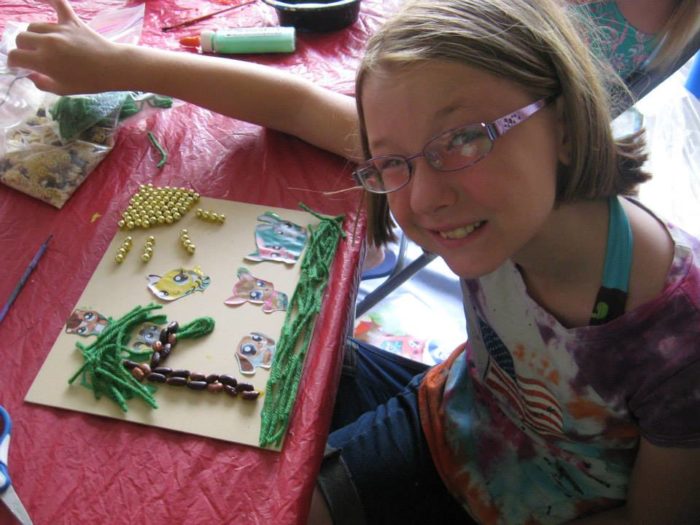
I challenge older students to create pictures with their collage instead of just cutting out pictures of things they enjoy. One way to do this is to show them a masterpiece and see if they can copy it without using a pencil! Glue on beans for tree bark, bits of yarn for leaves, bubble wrap for a cloud—you get the idea. You will definitely need white glue for this project—not glue sticks. Glitter glue or colored glue is fun with this as well.
Wet Clay
Get some wet clay that air dries and let the kids go wild! I purchased it from Discount School Supply in large 25-lb blocks. This will make a huge mess. Have disposable bowls of water for dipping fingers in to wet the clay and smooth it as they sculpt.
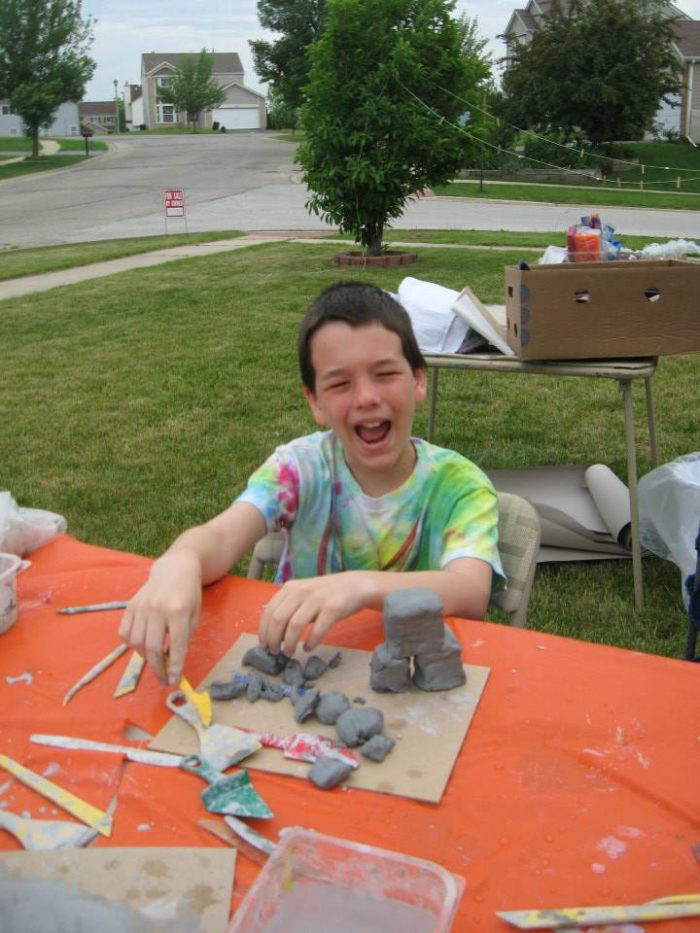
I use plastic knives, spoons, and forks as tools for them. It’s also helpful to have a piece of cardboard or firm disposable plate as their base to put a completed project on to allow it to dry.
Finger Painting
Finger painting is a favorite of all ages. Get some cheap glossy paper and finger paints. That’s it! Let them make a “messterpiece”!
I challenge my older artists to try to make a version of a famous painting here as well. This works really great with impressionistic pieces or modern art.
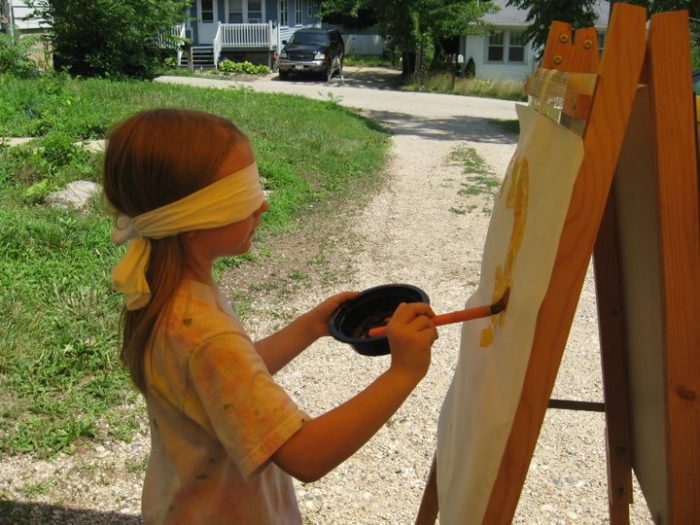
Blindfolded Art
Blindfolded art is fun too. Tie a bandana around your artist’s eyes (or have him close his eyes). This is great when you have an easel too. I give them each a paintbrush dipped in paint and then tell them to try to make a picture. The kids love to watch each other doing this.
Do-A-Dot (Bingo Markers)
Do-A-Dot (bingo markers) are also fun and messy for creating pictures. This is one I do at the end of the day to unwind, as it doesn’t take a lot of time to dry. The artists have fun doing this form of pointillism.
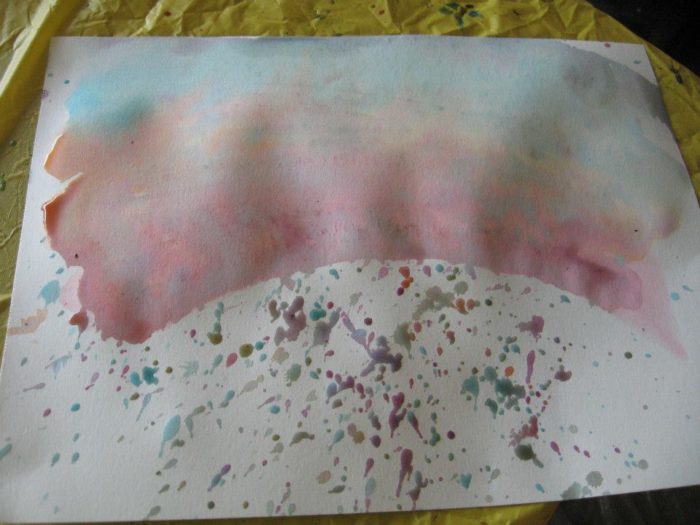
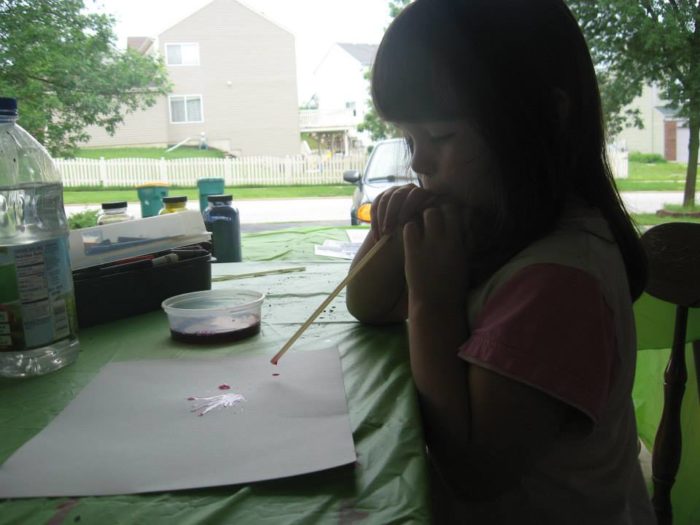
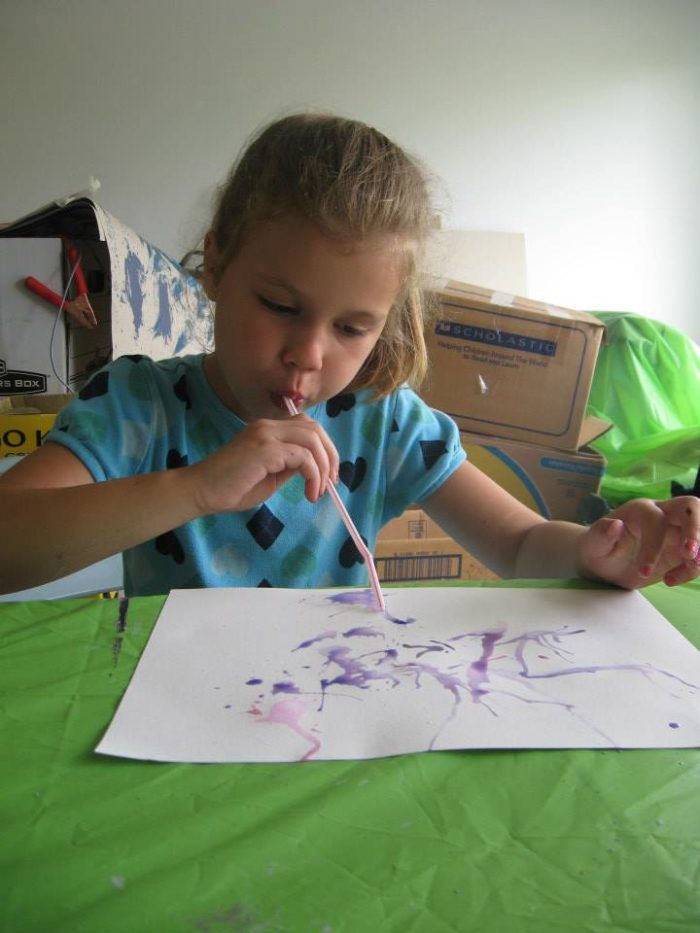
Blow Art
Blow art only requires straws to make a creative picture with watercolor paint. Drip some liquid watercolor on a page then blow through the straw to see where it spreads to make a unique design.
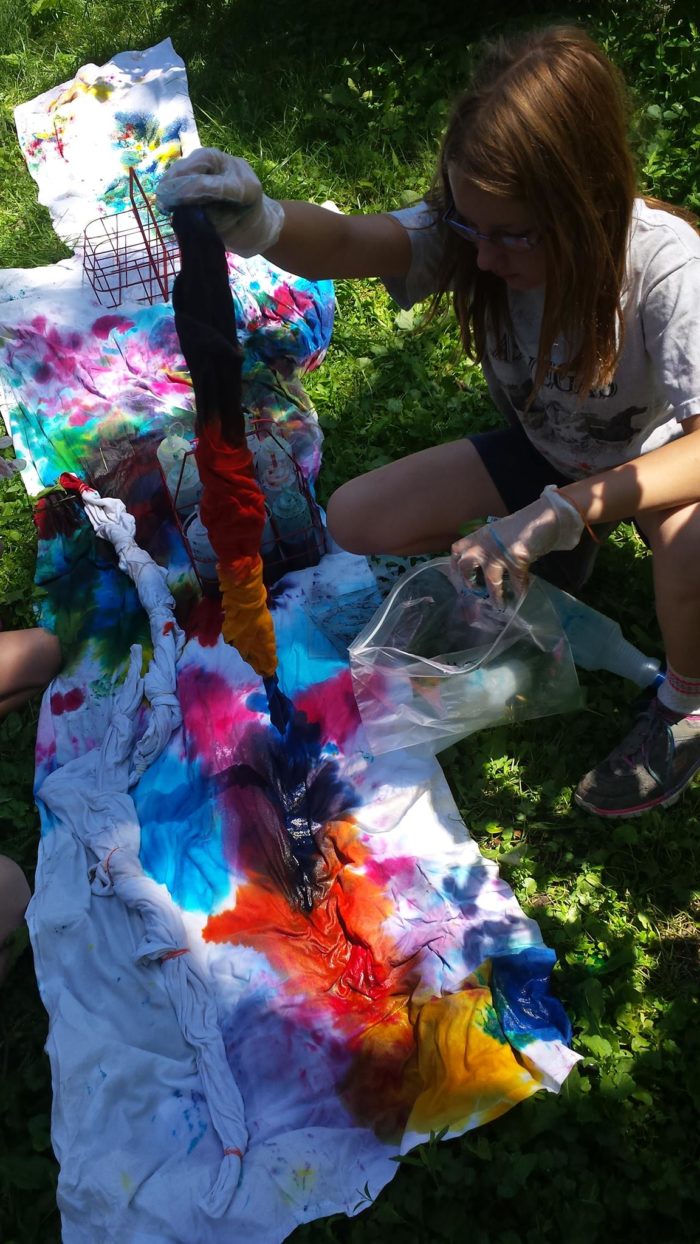
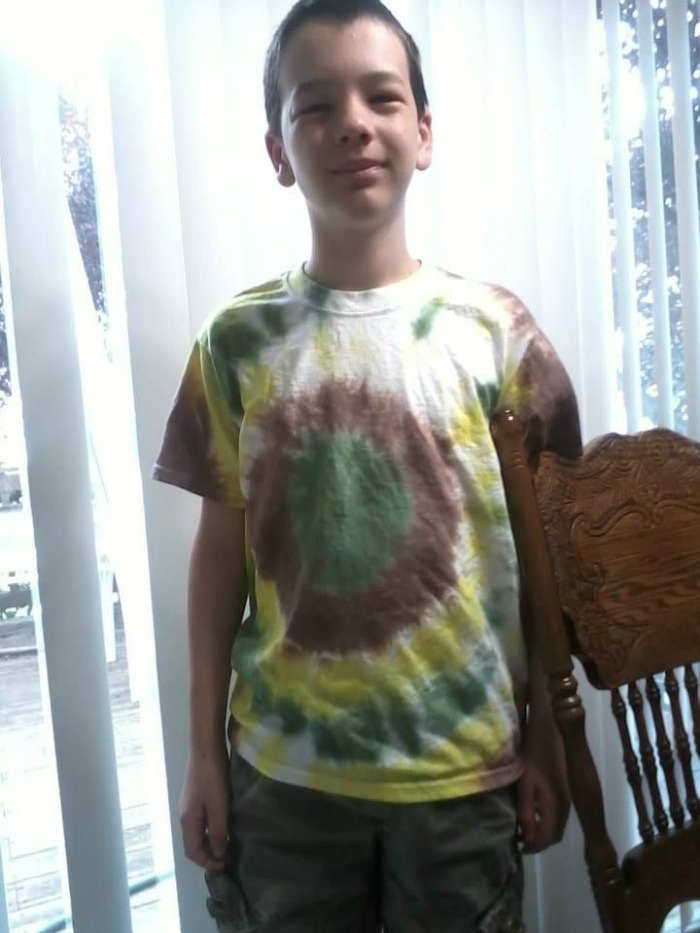
Tie Dye
Finally, tie dye is a great outdoor summer project. You can give new life to an old T-shirt or buy a brand new item to dye. I’ve had artists tie dye baseball hats, socks, bags, bandanas, and more!
I like the dyes available from Dharma Trading Co. They are more expensive and more work than the kits you buy online or in-store, but the colors are much more vibrant. If you’re only going to do it once, then just get the cheap Tie Dy kit. Otherwise, try Dharma’s dyes and be ready for some beautiful pieces.
In addition to the dye, make sure you have a drop cloth that can get stained (an old sheet works well for this), disposable gloves, and gallon-size plastic zipper bags. Spray bottles can be used if you desire a different look than traditional dipping. You will also need rubber bands to create certain looks. There are many ideas on Pinterest and how-to videos on YouTube.
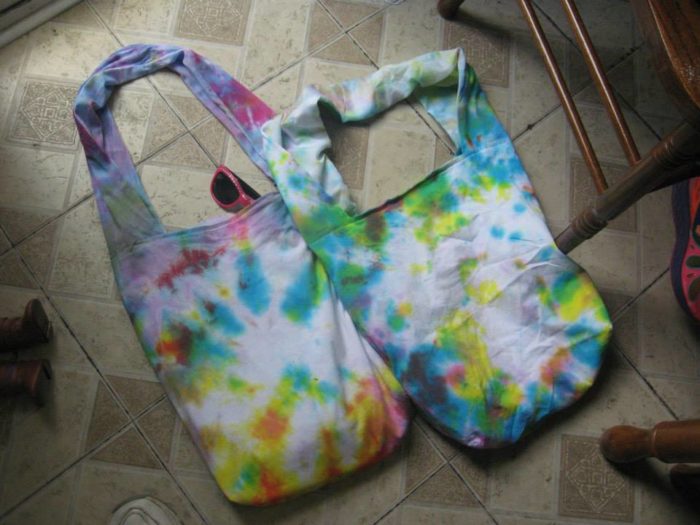
If you’re new to tie dye, start with the basics: bullseye, spiral, or crumple. Put your finished creation in the zipper bag, being careful to keep it flat so the dye doesn’t run, and seal it. I usually put them in the laundry room and let them sit for a few days. The longer they sit, the more dye soaks in.
When you’re ready to wash, put on disposable gloves, cut off any rubber bands, and run the piece under cold water until the water runs clear (or mostly clear). This can take awhile. Wash all dyed items together the first time—do not put anything in with them that you don’t want to possibly get dye on! Dry it and wear. Then in the future, wash as usual.
Supply List for Big Messy Art Camp:
(See specific links for some of these items up above!)
- Sunblock and shade (pop-up canopy, under a tree, work later in the afternoon if necessary)
- Table and chairs that can get a little messy
- Plastic table cloths (cheap is fine!)
- Trays for paint (disposable will make this easier on you)
- Containers for water
- Masking tape (This is key! You never know when the wind will strike and your camper’s masterpiece will blow away!)
- Garbage bags
- Clothesline and clothespins for hanging up masterpieces to dry
- Baby wipes (to clean up their hands between projects)
- Smocks for the kids (I usually just have them wear old clothes that can get stained)
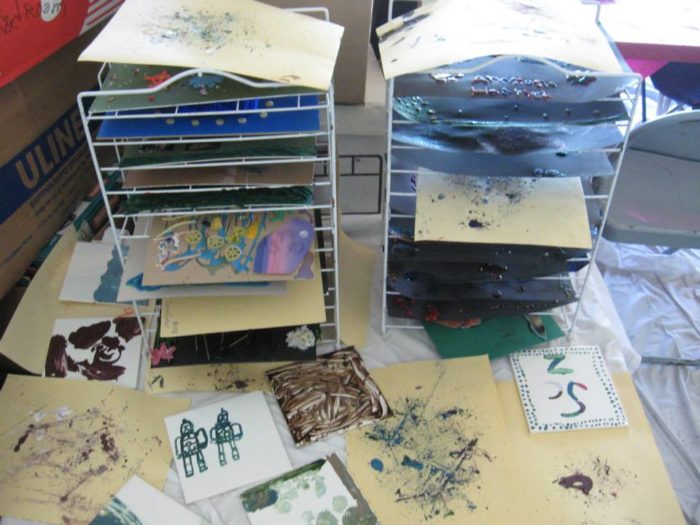
- Drying racks or stacking files for drying some of the projects if needed
- Art supplies for the projects you choose
For more ideas, see MaryAnn F. Kohl’s The Big Messy Art Book.

Download a Free Summer Camp Planning Guide!
Bio of Guest Poster:
Michelle Habrych is a homeschool mom of two teens and started teaching art classes and camps 13 years ago for her artistic daughter (who is now art college bound in 2021!). She enjoys creating art and observing art as well as reading and crocheting.
Summer Camp Series Posts:
- Big Messy Art Camp
- National Treasure Camp
- Night at the Museum Camp
- American Girl Craft Camp
- Star Wars Camp
- Spy Camp
- I Love Horses Camp
Related Posts:
- Pros and Cons of Homeschooling in the Summer
- Summer Media Guideline for a Smooth Summer (with free download)
- Free or Cheap Things to do With Kids in the Summer